Showing posts with label DIY. Show all posts

Sunday, August 19, 2012

Crafty weekend

So I have obviously felt extra crafty this weekend and coasters seem to be my thing right now.

I bought some regular white tiles at Lowe's and wanted to make some coasters with paper and mod podge since I haven't made any like this yet.
These coasters were pretty simple too but took some more time than the other ones I made.

Items needed:
1. A cutting mat
2. An exacto knife
3. A paint brush
4. Mod Podge
5. Scrap book paper (these are the four designs I chose to use)
6. Four white tiles (or however many you wish; I got these for 16 cents at Lowe's)
7. Krylon Protective, Non-Yellowing Clear Finish (not in the picture)


The first thing I did was place the tile on the scrap book paper and cut around the edge of the tile with the exacto knife.  I cut the paper slightly smaller than the outline of the tile so that the paper doesn't hang off the edges of the tile.  Also, I just used the edge of the tile to measure as opposed to using a ruler because I like the edges of the paper to be crooked and a rough measurement.  If you prefer a straight line, I would suggest using a ruler to measure the exact measurements of paper to use on the tile.


Next, I painted a couple layers of Mod Podge directly onto the tile.  It's okay if it's sloppy and runs onto the sides; Mod Podge dries clear.

Then, I lined the paper up on the tile and pressed it down to the surface.  It's very easy to get air bubbles and for the paper to wrinkle in the center of the tile so if you have this problem try using a credit card to scrape the paper completely flat. The paper edges may slightly turn up but that is okay at this point, it will be easy to fix.  Also, the Mod Podge dries fast so press down on the paper quickly and try not to allow the paper to slide around.

The next step is to paint on the surface of the paper.  I did several layers on top just to be on the safe side.  Be sure to paint along the edge of the tile and along the edge of the paper.  This will help to keep the edges of the paper from curling up.  Do as many layers as you feel comfortable with but keep in mind that doing an extreme amount of layers will be too much moisture for the paper and cause the surface of it to chip of and/or disintegrate.  Also know that too little amount of Mod Podge will not hold the paper to the surface of the tile and will cause the paper to tear off or fall off later on.
If the Mod Podge appears as a white coat, don't fret as this is normal.  Mod Podge dries clear so even if you coat it a lot, it still will not show when it dries.

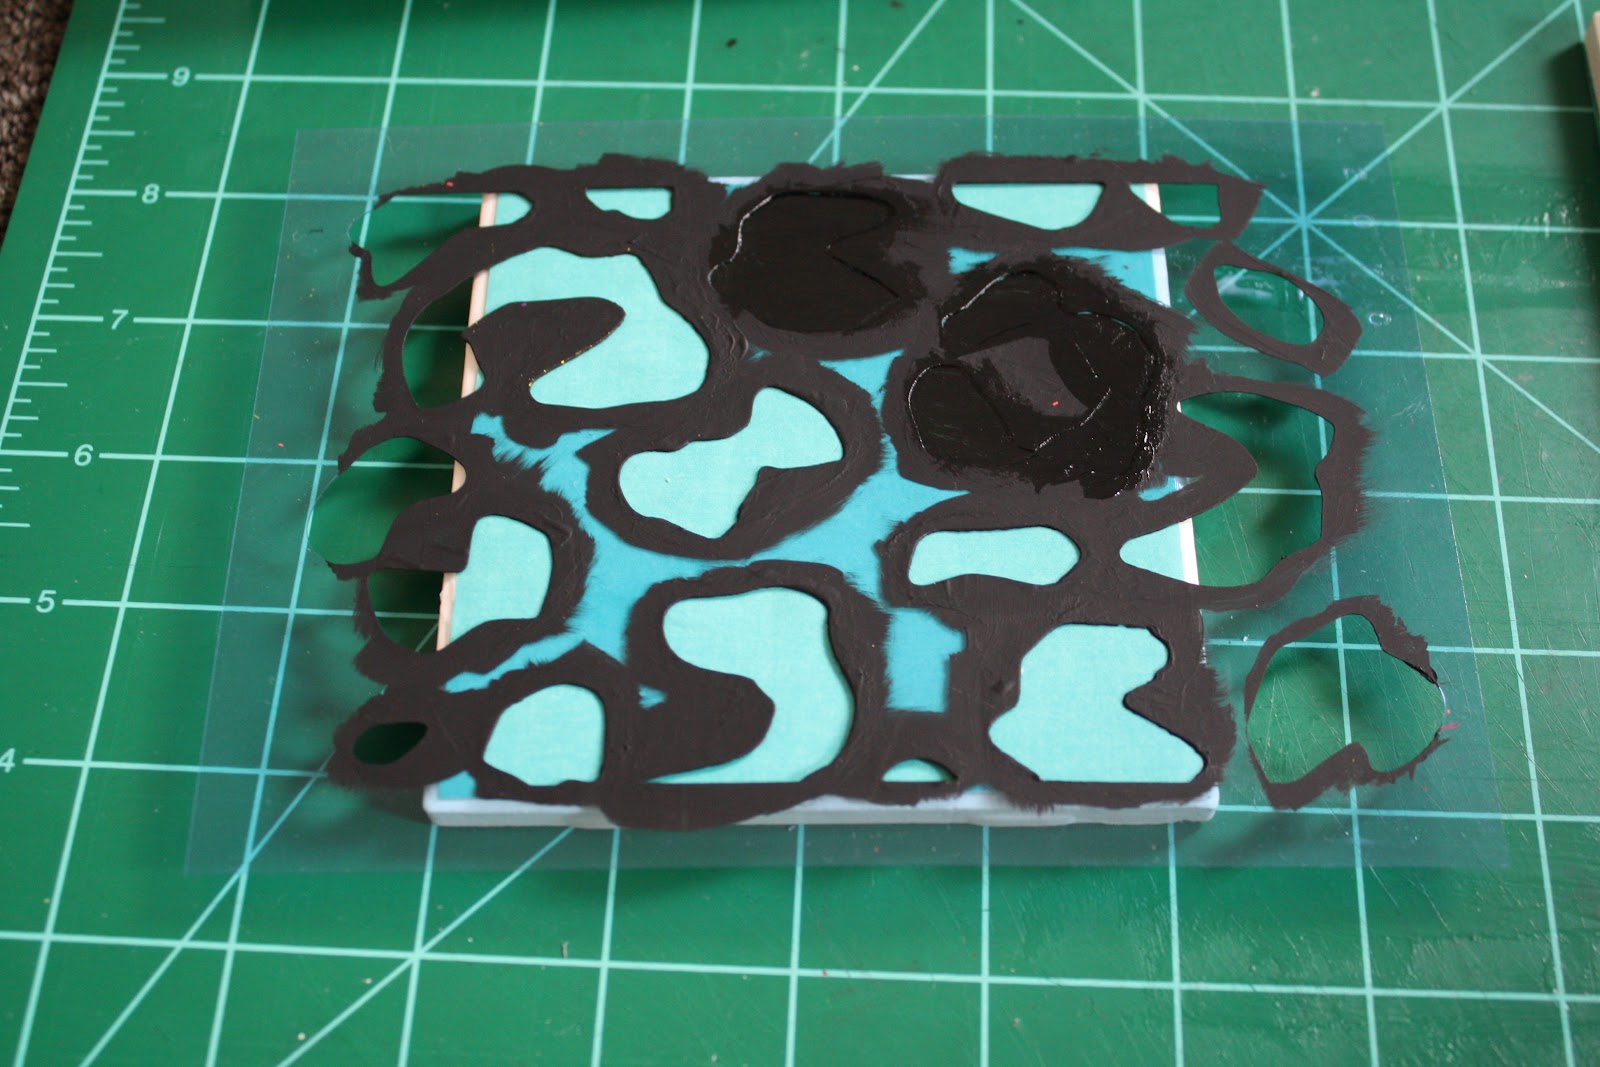
I repeated these steps with each of the four tiles and designs.  As you can see some of mine still have lumps or air bubbles so it is best to go back attempt to gently work those our while it is still wet.  I let the Mod Podge dry for about 30 minutes before I began the work on top of it.  You may want to let it dry longer, I am just impatient with my work.

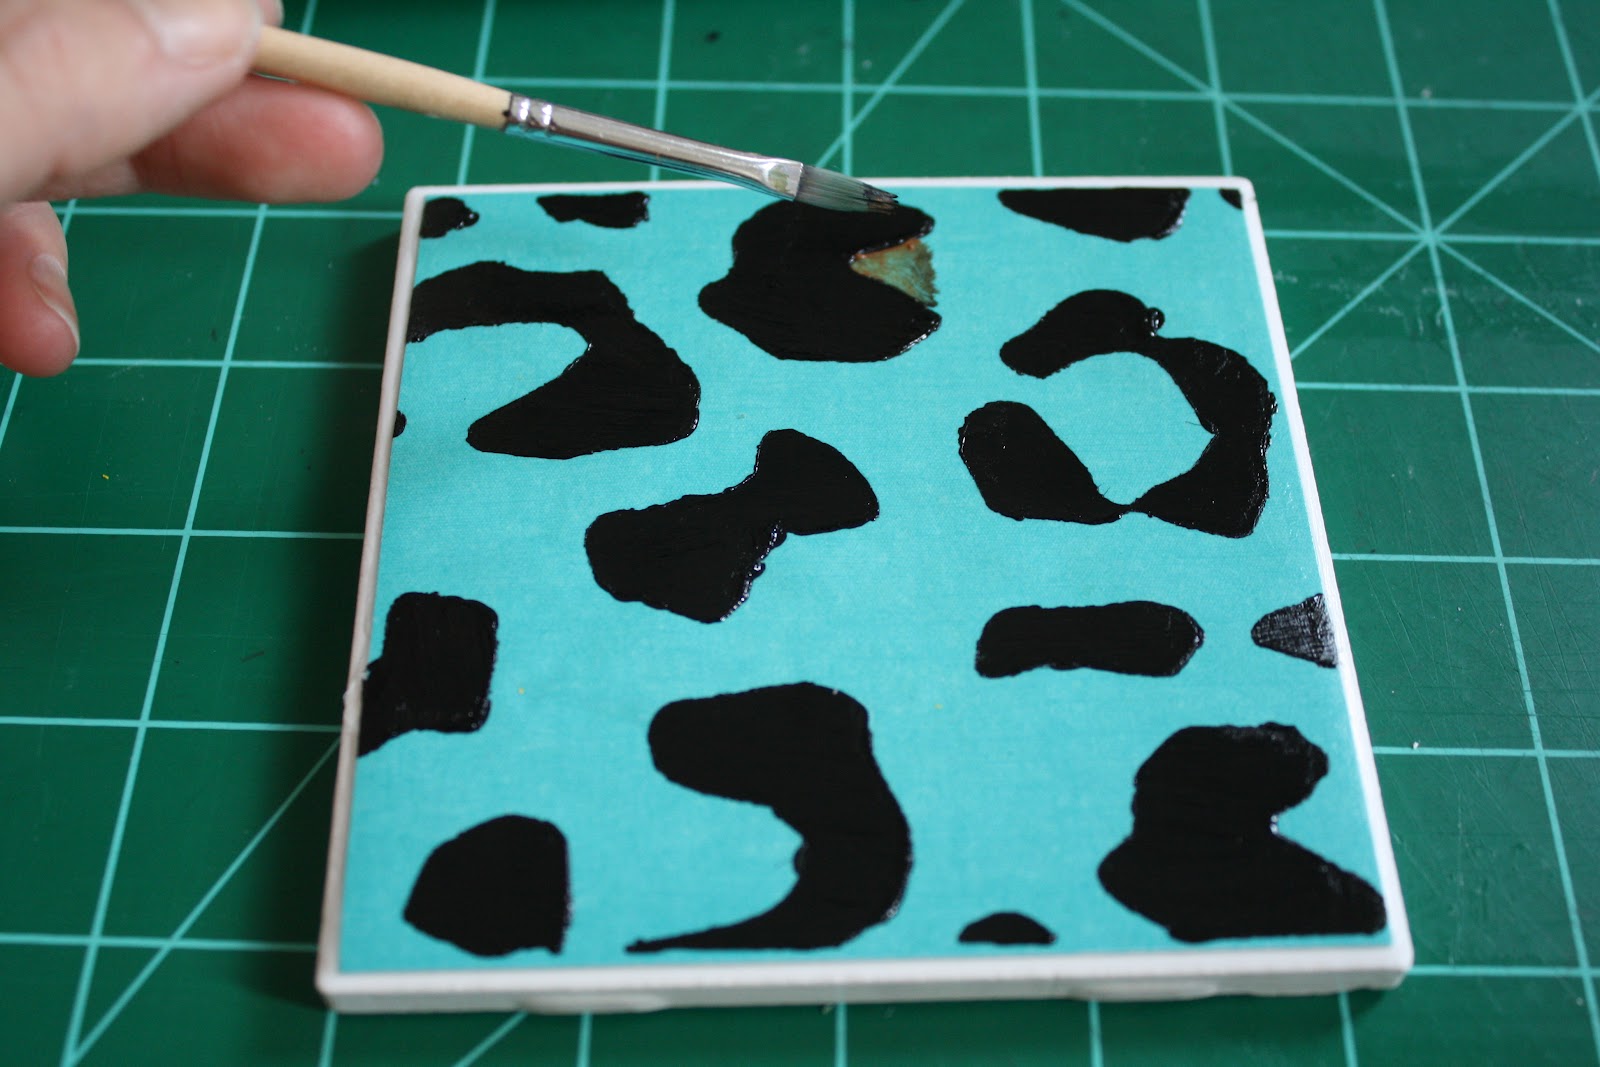
Here are a few things I added onto the top of the paper with Acrylic paint after the Mod Podge dried...

And these are my final results! After the paint and Mod Podge dried on all of them, I took them outside and sprayed the Krylon Clear Finish onto the top of them.  I did a few layers of the spray to be on the safe side and added rubber and cloth stoppers to the bottom to keep them from sliding around and from scratching the surface they are placed on.

Well I believe I need a break before I get started on my next Pinterest project! :)

xoxo

Stone Coaster DIY

Feeling crafty and having some free time on my hands this weekend, I decided to tackle a DIY I have been eager to complete for some time now.  As simple as this one was, the outcome has been one of my favorites so far.

I decided to make some coasters (to go along with the many that I have already). 
This is how simple this project is...
Things you need:
1. Letter stencils
2. A couple paint brushes
3. Black acrylic paint (or any color you prefer)
4. A cup of water
5. Stone tiles for the coasters (I got these at Lowe's for thirty-three cents each)
6. It would also be best to invest in some Krylon Protective, Non-Yellowing Clear Finish.

I decided to make these coasters for my roommate Christina and I, so I decided using our initials would be best!  I simply put the stencil where I wanted the initial and painted onto the stone.  I found that it was best not to mix water with the paint before painting on the tile.  It will cause the paint to run under the stencil while you are painting and thus ruin the design.  Just wet your brush, wipe it on a paper towel slightly then use the acrylic paint from there.

After allowing the paint to completely dry, take the tiles outside or somewhere you don't mind the smell, and spray the tiles with the Krylon protective finish.  This finishing coat adds a gloss touch as well as protects the paint from chipping off.  Allow the first coat to dry for about 30 minutes to an hour or until it is completely dry.  It should be dry at this point.  Then go back and spray another coat on top.  I did a total of three coats on each tile, but it's really whatever you feel is complete.

After the tiles were dry I went back and added rubber stoppers to the bottom of each tile.  I put one on each  corner making a total of four.  This will keep the tiles from sliding around as well as keep them from scratching the surface that you have them on.


And there you have it! Our new coasters to add to our cute home! I made four of each initial.


What are some of your favorite things to do with tiles?


xoxo

Wednesday, August 15, 2012

Getting There..

After two weeks of packing, partially living out of my car, moving in, MAJOR cleaning, unpacking, and (the best part) decorating, we are slowly but surely getting settled into our new place.  It's taking some time, and everything certainly isn't even close to finish, but it's getting there!  And I can't wait to see the finished product.  I've finally gotten the opportunity to start over fresh and take some new approaches in decorating my room as well as contributing to the rest of the house.  Here's a few peaks of some little items I have incorporated into my room..


You can never have too many pictures of your favorite coffee mug.
The flowers and my rug are probably my favorites focal points of my room so far!  I got the rug at a yard sale for $2 (major steal!) and I just bought the flowers at Big Lots for $6; fake of course, so they can give off this vibrant look forever :).  I painted these bottles black specifically for this purpose!  And I must say, it looks better than I could have imagined.  Another one of my faves are my lovely coasters that my best friend Megan made!  Perfect touch for the perfect room.

I'm in love with my new room and the changes throughout the rest of my life!  Pictures of the final product are soon to come.  Stay close by.


xoxo

Wednesday, June 15, 2011

Just another thing on my to do list this summer..

Ahhh, I love to paint! :) Just a few things I've started on for this summer. Many more to come. You should take up painting this summer as well! It's such a great feeling and stress relief..and so very relaxing out in this wonderful weather!